This guide applies to the wooden shipping crate shown in the illustrations. Packaging may vary between models: always follow the manufacturer’s instructions supplied with your particular model. If the crate or fastenings differ, ask for assistance before continuing.
Tools needed: flat screwdriver, Phillips screwdriver and scissors.
- Remove the packaging foam from the top.
- Remove the wooden crate from the outer carton box.
- Check that the model is securely fastened inside its crate. If it is not stable, do not turn the crate.
- Carefully lay the crate on its side.
- If there are any screws underneath the crate, remove them.
- Return the crate to its upright position.
- Use a flat screwdriver to carefully pry off the wooden planks on top. Watch out for sharp staples.
- If there are wooden planks across the middle of the crate, remove them. Work particularly gently near sails and rigging.
- Remove the wooden planks from the sides of the crate.
- Cut the shipping ties that secure the model to the crate. Cut only packaging fastenings, never the ship’s own rigging. Check that the model is free of all shipping fastenings.
- While a helper holds the crate open, slowly and carefully lift the model out.
- Remove any packaging materials still attached to the model.
- Gently blow away small remaining packaging debris. Do not direct strong or high-pressure air at delicate parts.
- Place your assembled ship model in its chosen display position and enjoy it!
Your ship model is already assembled; these steps describe removal of its protective packaging. Do not force the crate against the sails or masts. If unsure, stop and ask for assistance.
Illustrated example
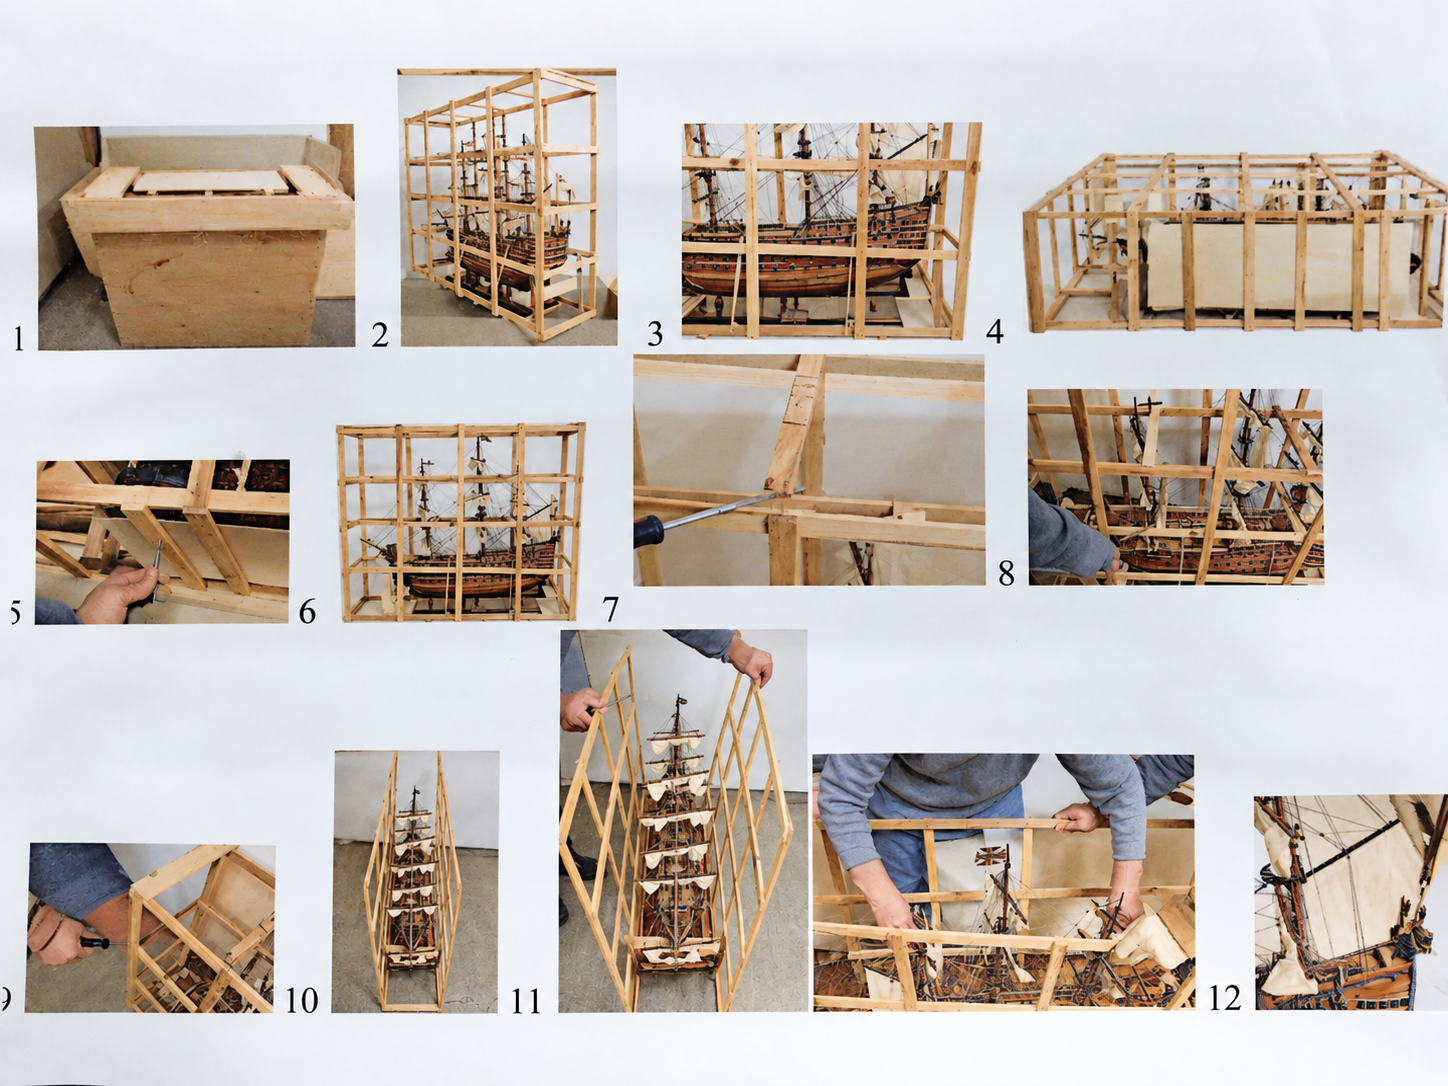
AI-colourised illustration based on the original picture sheet. Details and packaging may vary by model; the picture numbers do not correspond one-to-one with the written steps.